> For the complete documentation index, see [llms.txt](https://docs.heeler.com/mrecEO40m5D6bt7Pq5pE/llms.txt). Markdown versions of documentation pages are available by appending `.md` to page URLs; this page is available as [Markdown](https://docs.heeler.com/mrecEO40m5D6bt7Pq5pE/administer-and-monitor/manage-access/saml-sso.md).

# Single Sign-On (SAML)

Manage single sign-on through your SAML identity provider — the connection values, the options that govern it, and how to verify or remove it.

**Administration → Access → SAML Setup** connects Heeler to your SAML identity provider (Okta, Entra ID, Google, Ping, and others) so your team signs in with your existing IdP. This page covers managing and verifying that connection; for a step-by-step first-time walkthrough, follow the **View SAML setup guide** link on the page or [Get Started → SAML SSO](/mrecEO40m5D6bt7Pq5pE/get-started/users-and-access/saml.md).

{% hint style="info" %}
Changing anything on this page requires the **Administrator** role. An **Administrator (read-only)** can view it but can't make changes.
{% endhint %}

## How the page is laid out

The page is a short wizard you can revisit anytime.

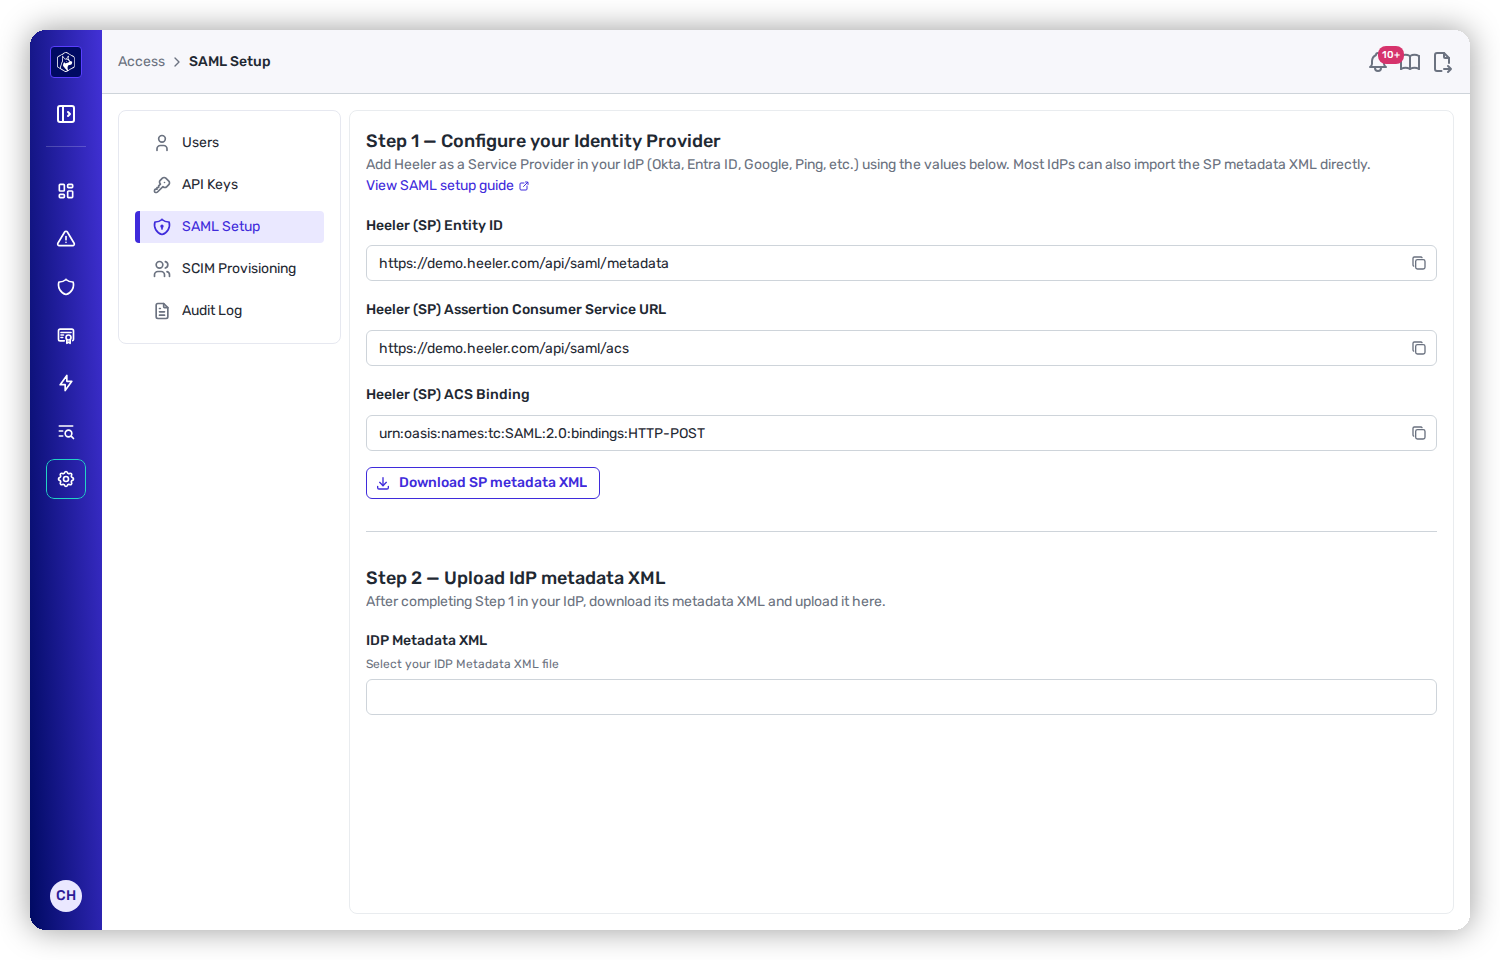
<figure><img src="https://414480750-files.gitbook.io/~/files/v0/b/gitbook-x-prod.appspot.com/o/spaces%2FXP3dp2kecwKA2KvYkntz%2Fuploads%2Fgit-blob-00829462916f2f1f5eb4c7ad6d08b9ffe242b848%2Fam-access-saml.png?alt=media" alt="The SAML Setup page: Step 1 shows Heeler&#x27;s SP Entity ID, ACS URL, and ACS Binding with a Download SP metadata XML button; Step 2 is an IdP metadata XML upload."><figcaption><p>SAML Setup — the service-provider values to give your IdP, then the IdP metadata you upload back.</p></figcaption></figure>

**Step 1 — Configure your Identity Provider.** Heeler shows the service-provider values your IdP needs — the **SP Entity ID**, **Assertion Consumer Service (ACS) URL**, and **ACS Binding** — each with a copy button. Most IdPs can import all of them at once from **Download SP metadata XML**.

**Step 2 — Upload IdP metadata XML.** After you've added Heeler in your IdP, download the IdP's metadata and upload it here. To replace it later, delete the connection and re-upload.

**Step 3 — Options.** These appear once IdP metadata is uploaded:

<table><thead><tr><th width="240">Option</th><th>What it does</th></tr></thead><tbody><tr><td><strong>Enable SAML</strong></td><td>Requires everyone to authenticate through your IdP. Leave off while you test, then turn on to enforce.</td></tr><tr><td><strong>SAML STRICT</strong></td><td>Enforces signing and encryption to the SAML standard — recommended once you've confirmed sign-in works.</td></tr><tr><td><strong>Just-in-Time Provisioning</strong></td><td>Creates a Heeler user automatically the first time someone signs in through the IdP, so you don't pre-invite them.</td></tr><tr><td><strong>Group Mapping</strong></td><td>Maps your IdP groups into Heeler.</td></tr></tbody></table>

Changes here save automatically.

## Verify it worked

Sign in as a test user through your IdP. On first SSO login, that user's **SAML Enabled** cell on the [Users](/mrecEO40m5D6bt7Pq5pE/administer-and-monitor/manage-access/users-and-roles.md) tab flips on automatically — confirmation the connection is live. Only enable **Enable SAML** for everyone once a test login succeeds.

## Remove it

**Delete Connection** removes the IdP configuration. If **Enable SAML** was enforcing SSO, make sure at least one admin can still sign in another way before you delete.

## Set it up

The full first-time SAML walkthrough is in Get Started:

{% content-ref url="/pages/FAmwsrVqAtPgUc8guk8g" %}
[SAML SSO](/mrecEO40m5D6bt7Pq5pE/get-started/users-and-access/saml.md)
{% endcontent-ref %}

## Related

* [Automated Provisioning (SCIM)](/mrecEO40m5D6bt7Pq5pE/administer-and-monitor/manage-access/scim-provisioning.md) — pair with SAML to sync users automatically.


---

# Agent Instructions
This documentation is published with GitBook. GitBook is the documentation platform designed so that both humans and AI agents can read, navigate, and reason over technical content effectively. Learn more at gitbook.com.

## Querying This Documentation
If you need additional information that is not directly available in this page, you can query the documentation dynamically by asking a question.

Perform an HTTP GET request on the current page URL with the `ask` query parameter, and the optional `goal` query parameter:

```
GET https://docs.heeler.com/mrecEO40m5D6bt7Pq5pE/administer-and-monitor/manage-access/saml-sso.md?ask=<question>&goal=<endgoal>
```

`ask` is the immediate question: it should be specific, self-contained, and written in natural language.
`goal` is optional and describes the broader end goal you are ultimately trying to accomplish on behalf of the user. GitBook uses it to tailor the answer towards what is most useful for that goal.

The response will contain a direct answer to the question and relevant excerpts and sources from the documentation.

Use this mechanism when the answer is not explicitly present in the current page, you need clarification or additional context, or you want to retrieve related documentation sections.
