> For the complete documentation index, see [llms.txt](https://docs.heeler.com/mrecEO40m5D6bt7Pq5pE/llms.txt). Markdown versions of documentation pages are available by appending `.md` to page URLs; this page is available as [Markdown](https://docs.heeler.com/mrecEO40m5D6bt7Pq5pE/administer-and-monitor/manage-access/users-and-roles.md).

# Users and Roles

Manage the people who can use Heeler — invite, set roles, deactivate — and understand what each role is allowed to do.

**Administration → Access → Users** is your roster. Every row is a person who can sign in, and the columns record how they authenticate and what they can do. This is where you add people, change what they're allowed to do, and cut off access when someone leaves.

{% hint style="info" %}
Changing anything on this page requires the **Administrator** role. An **Administrator (read-only)** can view it but can't make changes.
{% endhint %}

## What each column tells you

<table><thead><tr><th width="200">Column</th><th>What it means</th></tr></thead><tbody><tr><td><strong>Email / First / Last Name</strong></td><td>The person's identity. For SSO users these come from your identity provider and can't be edited here.</td></tr><tr><td><strong>Is Active</strong></td><td>Whether the account can sign in. Deactivating cuts off access immediately (see below).</td></tr><tr><td><strong>MFA Enabled</strong></td><td>Whether the person has set up multi-factor authentication on their Heeler login.</td></tr><tr><td><strong>SAML Enabled</strong></td><td>Whether this person signs in through your SAML identity provider rather than a Heeler password. It's set automatically the first time they sign in via SSO — it isn't a checkbox you toggle here.</td></tr><tr><td><strong>Role</strong></td><td>What the person is allowed to do — see the table below.</td></tr><tr><td><strong>Last Login</strong></td><td>When they were last active, which identifies dormant accounts.</td></tr></tbody></table>

## Roles and what they can do

Heeler has six roles, in ascending privilege:

<table><thead><tr><th width="230">Role</th><th>Can see</th><th>Can change</th></tr></thead><tbody><tr><td><strong>Team viewer</strong></td><td>The applications and repositories owned by the teams they belong to.</td><td>Nothing tenant-wide. This is the default for a new user.</td></tr><tr><td><strong>Team contributor</strong></td><td>The same team-scoped view as a Team viewer.</td><td>Can trigger agentic remediation (Fix Now) on findings they can see — but no admin settings.</td></tr><tr><td><strong>Organization viewer</strong></td><td>Every repository, application, and finding in the tenant — the whole estate, not just their teams'.</td><td>Nothing, and no administrative surfaces either. Use it for someone who needs to see across the organization without being an admin at all.</td></tr><tr><td><strong>Organization contributor</strong></td><td>Everything an Organization viewer sees — the whole tenant.</td><td>Can trigger agentic remediation (Fix Now) on any finding in the tenant — but no admin settings. The role for a central security group that fixes findings everywhere.</td></tr><tr><td><strong>Administrator (read-only)</strong></td><td>Everything an Administrator sees — all repositories, findings, and settings across the tenant.</td><td>Nothing. Every change is blocked. Good for auditors and leadership who need full visibility without the ability to alter policy.</td></tr><tr><td><strong>Administrator</strong></td><td>Everything, tenant-wide.</td><td>Everything — users, connections, program policy, remediation. This is the role that runs this whole section.</td></tr></tbody></table>

{% hint style="info" %}
**Team viewers** and **Team contributors** see the applications and repositories owned by the teams they belong to — visibility follows **team membership**, so adding someone to a team grants the right scope without re-granting access repository by repository. **Organization viewer**, **Organization contributor** and the two Administrator roles see the whole tenant.

Visibility and authority are separate grants. **Organization viewer** is the role to reach for when someone needs to see across the organization but has no business administering it — an auditor, a security lead outside the owning team, a leader tracking the estate. **Administrator (read-only)** goes further: it also sees the administrative surfaces (connections, policy, users) without being able to change them. **Organization contributor** adds the one write grant a Team contributor has — triggering agentic remediation — across every repository in the tenant.
{% endhint %}

## Invite someone

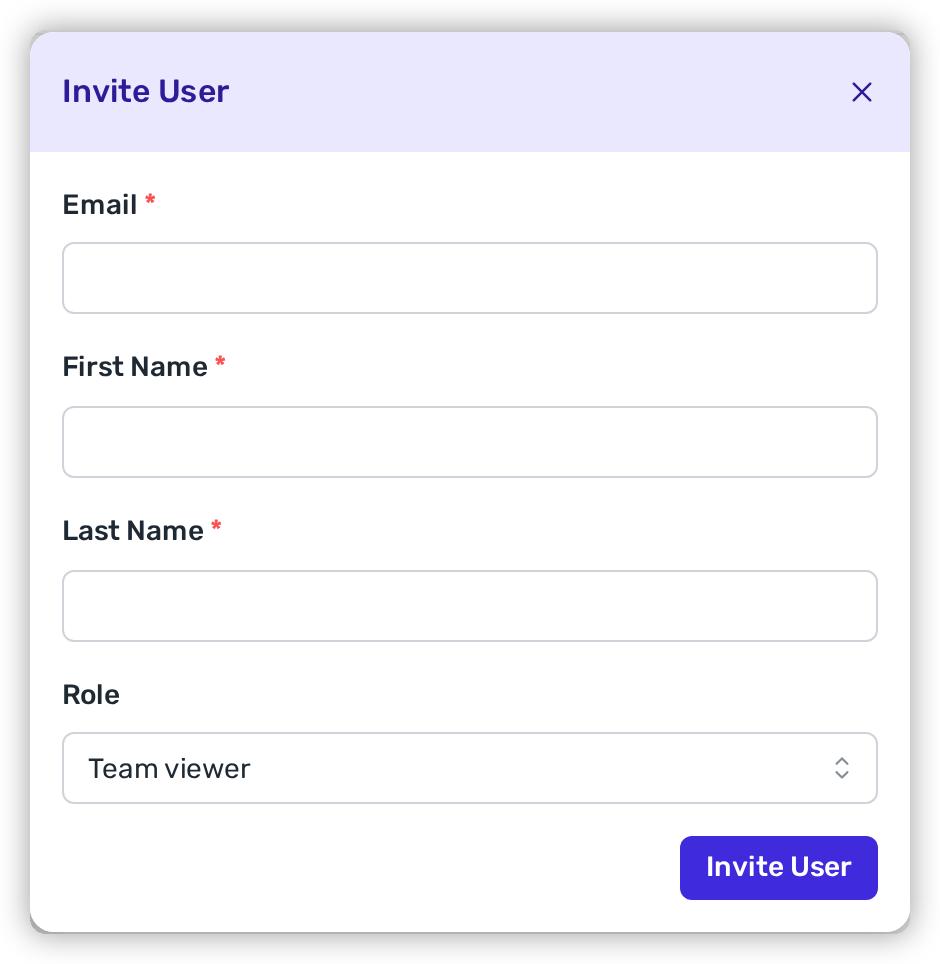
Click **Invite User**, fill in their email and name, and pick a role (it defaults to **Team viewer**). They'll receive an email invitation.

<figure><img src="https://414480750-files.gitbook.io/~/files/v0/b/gitbook-x-prod.appspot.com/o/spaces%2FXP3dp2kecwKA2KvYkntz%2Fuploads%2Fgit-blob-c5a6e7969b8d6061f021912e4c8990cc185bcc3e%2Fcc-users-invite.png?alt=media" alt="The Invite User modal with fields for Email, First Name, Last Name, and a Role selector set to Team viewer."><figcaption><p>Inviting a user — email, name, and the starting role.</p></figcaption></figure>

If your tenant uses [SCIM provisioning](/mrecEO40m5D6bt7Pq5pE/administer-and-monitor/manage-access/scim-provisioning.md), you generally won't invite people by hand — they're created automatically when assigned the Heeler app in your identity provider. Use manual invites for contractors or anyone outside that flow. New SCIM users start with the [default role](/mrecEO40m5D6bt7Pq5pE/administer-and-monitor/manage-access/scim-provisioning.md#choose-the-default-role) set on the SCIM Provisioning page.

## Change what someone can do

Use the **⋯** menu at the end of a person's row:

<table><thead><tr><th width="220">Action</th><th>What happens</th></tr></thead><tbody><tr><td><strong>Edit User</strong></td><td>Change their role (or name, for non-SSO users). Takes effect on their next request.</td></tr><tr><td><strong>Disable User</strong> / <strong>Enable User</strong></td><td>Deactivating a user cuts off access right away — it revokes their API tokens and ends their active sessions. Re-enabling restores access. Use this the moment someone leaves.</td></tr><tr><td><strong>Reset Password</strong></td><td>Sends a password-reset email and logs them out everywhere. Only appears for password-based users — SSO users manage credentials in your identity provider, so it's hidden for them.</td></tr><tr><td><strong>Unlock User</strong></td><td>Appears only when an account has been locked (too many failed logins). Restores their ability to sign in.</td></tr><tr><td><strong>Delete User</strong></td><td>Removes the account entirely. For someone who's left, <strong>Disable</strong> is usually the safer choice — it preserves their history in the audit log and their attribution on past work.</td></tr></tbody></table>

### Change several people's roles at once

Tick the checkboxes down the left of the table (or the header box to select everyone loaded). A **"N items selected"** bar appears with **Change Role**. It opens a dialog that shows how many people you selected and a role picker; the confirmation line reads back the count and the new role before anything happens. Press **Change Role** to apply it.

Two rules to know:

* **Up to 50 people per change.** With more selected, **Change Role** is disabled and its tooltip says how many to deselect.
* **Already there is left alone.** Anyone already on the chosen role is skipped and not counted. The message that appears after the change tells you how many people actually changed.

{% hint style="info" %}
If the confirmation message says some people **need a follow-up**, their role did change but Heeler could not finish cleaning up their previous access. Open **Edit User** for each one, set the role the message names (**Organization viewer** when you were assigning Team viewer or Team contributor, otherwise **Team viewer**), save, then set the intended role again. That second change completes the cleanup.
{% endhint %}

## Verify it worked

* A role change shows immediately in the **Role** column.
* A bulk role change appears in the [Audit Log](/mrecEO40m5D6bt7Pq5pE/administer-and-monitor/audit-log.md) as one entry listing everyone it covered and the new role.
* A deactivated user flips to a cleared **Is Active** cell and can no longer sign in.
* Every one of these actions is recorded in the [Audit Log](/mrecEO40m5D6bt7Pq5pE/administer-and-monitor/audit-log.md) with who did it and when.

## Set it up

Inviting your team and the full roles reference are covered in Get Started:

{% content-ref url="/pages/645U5yhn5puBcXNkEEgC" %}
[Users and Access](/mrecEO40m5D6bt7Pq5pE/get-started/users-and-access.md)
{% endcontent-ref %}

## Related

* [API Keys](/mrecEO40m5D6bt7Pq5pE/administer-and-monitor/manage-access/api-keys.md) — programmatic access that inherits the creator's role.
* [Automated Provisioning (SCIM)](/mrecEO40m5D6bt7Pq5pE/administer-and-monitor/manage-access/scim-provisioning.md) — sync users from your identity provider instead of inviting them by hand.


---

# Agent Instructions
This documentation is published with GitBook. GitBook is the documentation platform designed so that both humans and AI agents can read, navigate, and reason over technical content effectively. Learn more at gitbook.com.

## Querying This Documentation
If you need additional information that is not directly available in this page, you can query the documentation dynamically by asking a question.

Perform an HTTP GET request on the current page URL with the `ask` query parameter, and the optional `goal` query parameter:

```
GET https://docs.heeler.com/mrecEO40m5D6bt7Pq5pE/administer-and-monitor/manage-access/users-and-roles.md?ask=<question>&goal=<endgoal>
```

`ask` is the immediate question: it should be specific, self-contained, and written in natural language.
`goal` is optional and describes the broader end goal you are ultimately trying to accomplish on behalf of the user. GitBook uses it to tailor the answer towards what is most useful for that goal.

The response will contain a direct answer to the question and relevant excerpts and sources from the documentation.

Use this mechanism when the answer is not explicitly present in the current page, you need clarification or additional context, or you want to retrieve related documentation sections.
