> For the complete documentation index, see [llms.txt](https://docs.heeler.com/mrecEO40m5D6bt7Pq5pE/llms.txt). Markdown versions of documentation pages are available by appending `.md` to page URLs; this page is available as [Markdown](https://docs.heeler.com/mrecEO40m5D6bt7Pq5pE/get-started/users-and-access/saml.md).

# SAML SSO

Configure SAML 2.0 single sign-on so your team logs into Heeler through your identity provider.

**What this unlocks:** your team signs into Heeler through your existing identity provider — Okta, Microsoft Entra ID, Google, Ping, Auth0, or any SAML 2.0 IdP — so access follows the accounts and groups you already manage. Heeler uses SAML 2.0 for every SSO configuration, standard providers and custom alike.

## Before you start

* A **SAML 2.0 identity provider**.
* **Administrator access** to that IdP (to register a new application).
* **Administrator** access in Heeler (SAML setup is an admin-only capability — see [Roles and Permissions](/mrecEO40m5D6bt7Pq5pE/get-started/users-and-access/roles-and-permissions.md)).

SAML handles **authentication** — how users log in. It does not create or remove accounts on its own; for automated account lifecycle, add [SCIM Provisioning](/mrecEO40m5D6bt7Pq5pE/get-started/users-and-access/scim-provisioning.md) once SAML is working.

## Set up SAML

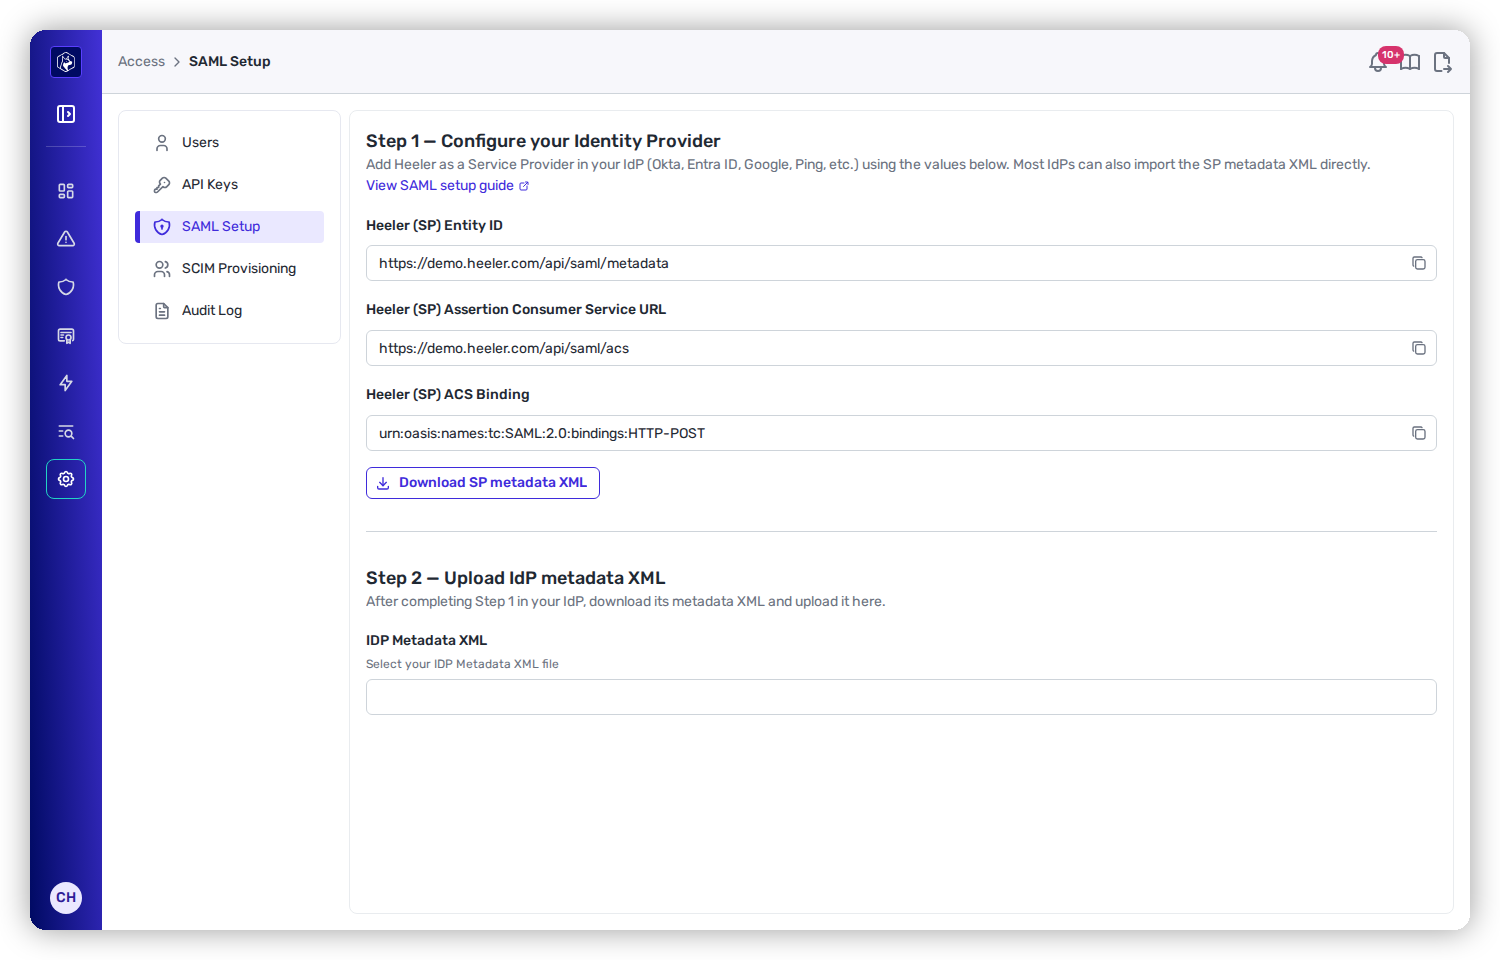
Open the **SAML Setup** page under **Administration → Access**, then work through it top to bottom.

<figure><img src="https://414480750-files.gitbook.io/~/files/v0/b/gitbook-x-prod.appspot.com/o/spaces%2FXP3dp2kecwKA2KvYkntz%2Fuploads%2Fgit-blob-84581f9b42edcbf90d901a4584bffa74e07dc2a4%2Fcc-gs-saml-setup.png?alt=media" alt="The SAML Setup page: Step 1 shows Heeler&#x27;s SP Entity ID, ACS URL, and ACS Binding with a Download SP metadata XML button; Step 2 is the IdP metadata XML upload."><figcaption><p>SAML Setup — Heeler's Service Provider values to register in your IdP (Step 1), then the IdP metadata upload (Step 2).</p></figcaption></figure>

{% stepper %}
{% step %}

### Register Heeler in your IdP

The SAML Setup page shows Heeler's Service Provider values at the top. Create a new SAML application in your IdP and copy them across:

| Value                                    | What it is                                       |
| ---------------------------------------- | ------------------------------------------------ |
| **Entity ID**                            | Heeler's SAML identifier                         |
| **Assertion Consumer Service (ACS) URL** | Where Heeler receives SAML responses             |
| **ACS Binding**                          | `urn:oasis:names:tc:SAML:2.0:bindings:HTTP-POST` |

For IdPs that accept a metadata file (Okta, Microsoft Entra ID, Auth0, and most others), use **Download SP metadata XML** instead of copying values by hand.

Heeler requires:

* SAML 2.0 with the **HTTP-POST** binding for assertions (`urn:oasis:names:tc:SAML:2.0:bindings:HTTP-POST`)
* NameIDPolicy format `urn:oasis:names:tc:SAML:1.1:nameid-format:emailAddress`
* **Signed** SAML responses
* The attributes **First Name**, **Last Name**, and **Email**

The SP values each have a **copy icon** for the clipboard; for IdPs that import XML, use **Download SP metadata XML** instead.
{% endstep %}

{% step %}

### Upload your IdP metadata

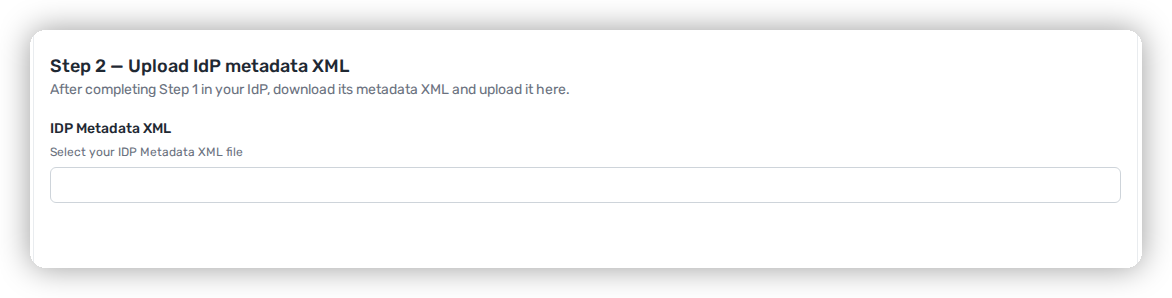
Once Heeler is registered, download your IdP's metadata XML and upload it in **Step 2** of the SAML Setup form. This tells Heeler where to send authentication requests and which signing certificate to trust.
{% endstep %}

{% step %}

### Choose your options

After the metadata is uploaded, these options appear:

| Option                                        | What it does                                                                                                                      |
| --------------------------------------------- | --------------------------------------------------------------------------------------------------------------------------------- |
| **SAML Strict** *(recommended)*               | Enforce strict SAML — including signing and encryption — against your IdP.                                                        |
| **Just-in-Time Provisioning** *(recommended)* | Create a Heeler account automatically the first time a user logs in from the IdP. Automatically disabled when SCIM is configured. |
| **Group Mapping**                             | Sync IdP group membership into Heeler.                                                                                            |
| **Enable SAML**                               | Turn SAML authentication on for your domain.                                                                                      |
| {% endstep %}                                 |                                                                                                                                   |

{% step %}

### Validate, then enable

Leave **Enable SAML** off while you test. Sign in through your IdP once to confirm it works, then turn **Enable SAML** on for your domain.
{% endstep %}
{% endstepper %}

Need to start over? **Delete Connection** (bottom-right of the SAML Setup page) fully removes the uploaded IdP metadata and SAML configuration, leaving the page ready to reconfigure.

## Configure your identity provider

The steps above are the same for every IdP; the field names differ. Register Heeler using your provider's SAML application, then map the three required attributes.

{% tabs %}
{% tab title="Okta" %}

1. In the Okta admin console, open **Applications**, create a new **SAML 2.0** app, and open **General → SAML Settings**.
2. Set **Single sign-on URL** to Heeler's ACS URL, and check **Use this for Recipient URL and Destination URL**.
3. Set **Audience URI (SP Entity ID)** to Heeler's Entity ID.
4. Set **Name ID format** to **EmailAddress** and keep the default **HTTP-POST** binding.
5. Under **Attribute Statements**, add the three attributes Heeler requires:

| Name         | Value            |
| ------------ | ---------------- |
| `First Name` | `user.firstName` |
| `Last Name`  | `user.lastName`  |
| `Email`      | `user.email`     |

6. Finish the app, then use its **Identity Provider metadata** link to download the metadata XML you'll upload in **Step 2** of the SAML Setup page.

<figure><img src="https://414480750-files.gitbook.io/~/files/v0/b/gitbook-x-prod.appspot.com/o/spaces%2FXP3dp2kecwKA2KvYkntz%2Fuploads%2Fgit-blob-816b890a924910cc5d21400ffd881f6eccbc49e8%2Fokta-saml-settings.png?alt=media" alt="Step 2 of Heeler&#x27;s SAML Setup page: Upload IdP metadata XML, with the IDP Metadata XML file picker."><figcaption><p><strong>Step 2</strong> of Heeler's SAML Setup page — where the metadata XML you downloaded from Okta gets uploaded.</p></figcaption></figure>
{% endtab %}

{% tab title="Microsoft Entra ID" %}

1. In the Azure Portal, open **Microsoft Entra ID → Enterprise Applications**, create a new application, and open **Single sign-on → SAML**.
2. Under **Basic SAML Configuration**, set **Identifier (Entity ID)** to Heeler's Entity ID and **Reply URL (Assertion Consumer Service URL)** to Heeler's ACS URL.
3. Under **Attributes & Claims**, set the **Unique User Identifier (Name ID)** to the user's email address (`user.mail`), formatted as **emailAddress**.
4. Add claims for the three attributes Heeler requires:

| Claim name   | Source attribute | Heeler field  |
| ------------ | ---------------- | ------------- |
| `First Name` | `user.givenname` | First name    |
| `Last Name`  | `user.surname`   | Last name     |
| `Email`      | `user.mail`      | Email address |

5. Under **SAML Signing Certificate**, set **Signing Option** to **Sign SAML response** so Entra signs the response Heeler receives.
6. Download the **Federation Metadata XML** and upload it in **Step 2** of the SAML Setup page.
   {% endtab %}
   {% endtabs %}

{% hint style="info" %}
For any other SAML 2.0 IdP (Google, Ping, Auth0, and custom providers), the requirements are the same: NameID format `emailAddress`, signed SAML responses, HTTP-POST binding, and the **First Name**, **Last Name**, and **Email** attributes.
{% endhint %}

## Common problems

<table><thead><tr><th width="330">Symptom</th><th>Fix</th></tr></thead><tbody><tr><td>Login fails with "assertion not signed" or a signature error</td><td>Enable <strong>response signing</strong> in your IdP so it signs the SAML response, and confirm <strong>SAML Strict</strong> matches what your IdP sends. Heeler requires signed responses.</td></tr><tr><td>Login loops back to the IdP without signing in</td><td>NameID or email attribute mismatch — the IdP isn't sending the NameID as <code>emailAddress</code>, or the <strong>Email</strong> attribute doesn't match the account. Confirm the NameID format and the three attribute statements (First Name, Last Name, Email).</td></tr><tr><td>Intermittent "assertion expired" / "not yet valid" errors</td><td>Clock skew between your IdP and Heeler. Sync both systems to NTP so the assertion's validity window is honored.</td></tr></tbody></table>

## You're done when…

* [ ] Heeler is registered as a SAML app in your IdP.
* [ ] Your IdP metadata is uploaded to the SAML Setup page.
* [ ] You've signed in successfully through the IdP with a test user.
* [ ] **Enable SAML** is on.

## Related

* [SCIM Provisioning](/mrecEO40m5D6bt7Pq5pE/get-started/users-and-access/scim-provisioning.md) — automate account creation and deactivation. SAML alone authenticates users but doesn't provision or deprovision them; SCIM does.
* [Roles and Permissions](/mrecEO40m5D6bt7Pq5pE/get-started/users-and-access/roles-and-permissions.md) — decide what each user can see and do.

{% hint style="warning" %}
When SCIM provisioning is active, **Just-in-Time Provisioning is automatically disabled** so the two don't conflict — SCIM becomes the sole mechanism for creating accounts.
{% endhint %}


---

# Agent Instructions
This documentation is published with GitBook. GitBook is the documentation platform designed so that both humans and AI agents can read, navigate, and reason over technical content effectively. Learn more at gitbook.com.

## Querying This Documentation
If you need additional information that is not directly available in this page, you can query the documentation dynamically by asking a question.

Perform an HTTP GET request on the current page URL with the `ask` query parameter, and the optional `goal` query parameter:

```
GET https://docs.heeler.com/mrecEO40m5D6bt7Pq5pE/get-started/users-and-access/saml.md?ask=<question>&goal=<endgoal>
```

`ask` is the immediate question: it should be specific, self-contained, and written in natural language.
`goal` is optional and describes the broader end goal you are ultimately trying to accomplish on behalf of the user. GitBook uses it to tailor the answer towards what is most useful for that goal.

The response will contain a direct answer to the question and relevant excerpts and sources from the documentation.

Use this mechanism when the answer is not explicitly present in the current page, you need clarification or additional context, or you want to retrieve related documentation sections.